Logo Options for Silicone Tableware: A Simple Guide
A Comprehensive Guide to Logo Application Methods on Silicone Tableware: Processes, Pros & Cons, Production Cost (Estimated), and Recommendations.
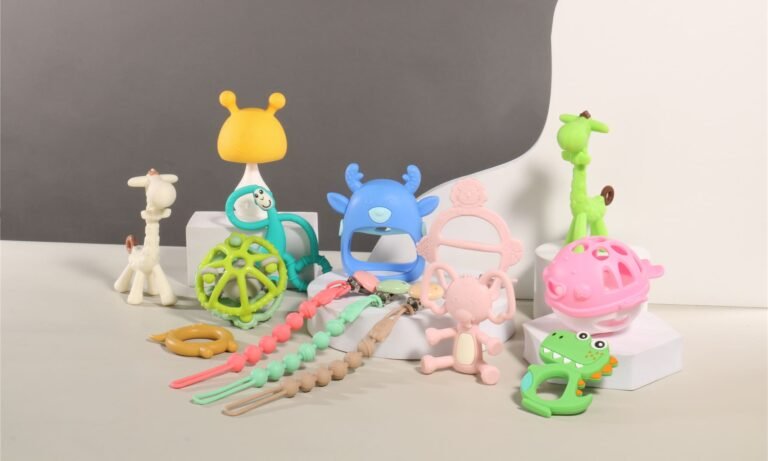
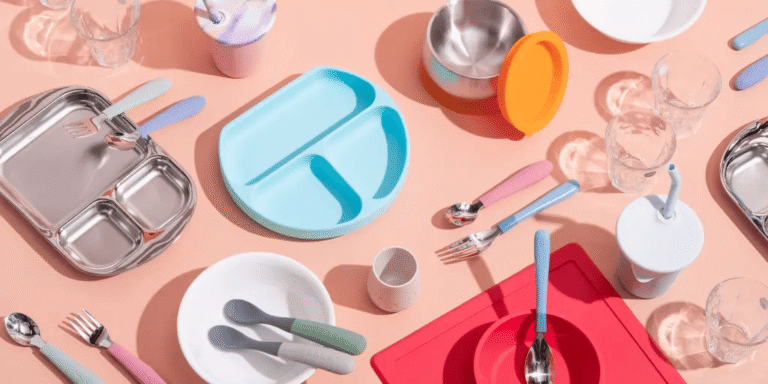
Adding a brand logo to silicone tableware – such as baby spoons, feeding plates, baking molds, or lunchbox accessories – is essential not only for brand identity but also for product aesthetics, safety, and market competitiveness.
Currently, four primary methods are used in the industry to apply logos onto silicone tableware:
①. Embossed (in-mold) Logo
②. Laser Marking (Laser Engraving Logo)
③. Screen Printing Logo
④. Heat Transfer Printing Logo
This article provides a detailed comparison of these four techniques across multiple dimensions—including working principles, production processes, advantages and disadvantages, cost structures, food safety compliance, and ideal use cases—and concludes with practical recommendations to help brands select the optimal solution.
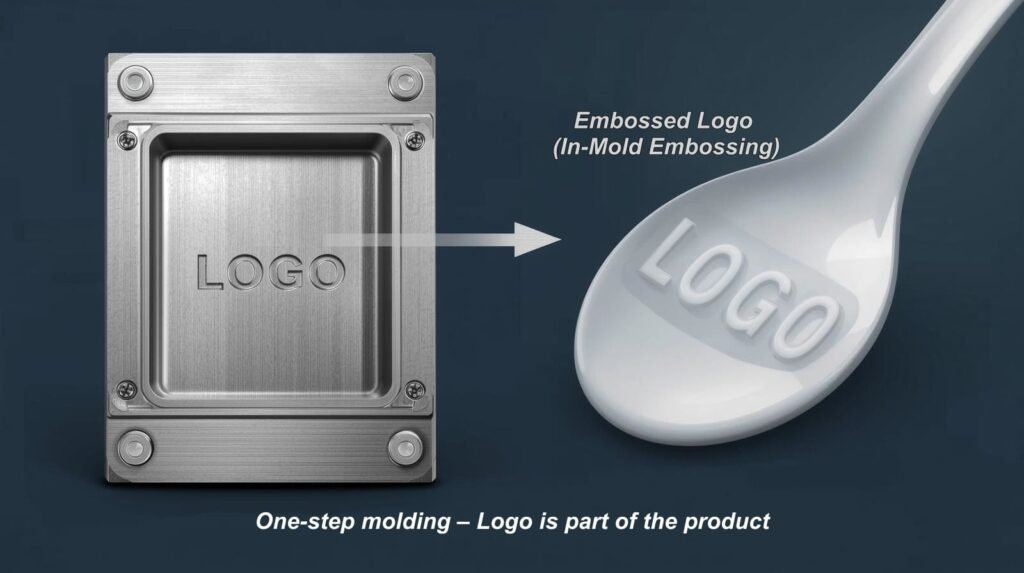
①. Embossed (in-mold) Logo
1.1 Working Principle & Process
Core Concept: The logo is physically formed during the silicone molding process using a custom-designed mold.
Production Steps:The logo design is precisely engraved as a recessed pattern into the cavity of a metal mold (typically aluminum or steel) using CNC or EDM machining.
Food-grade silicone is injected into the mold. After high-temperature vulcanization and demolding, the finished product features a raised (embossed) logo.
No post-processing is required—the logo is integral to the product.
1.2 Advantages
Permanent & Durable: The logo cannot peel, fade, or wear off—it’s part of the product itself.
Fully Food-Safe: No inks, coatings, or additives are used, making it ideal for direct food contact.
Premium Tactile Experience: The 3D embossing adds sophistication and enhances brand recognition.
Excellent Durability: Withstands temperatures from -40°C to 230°C and repeated dishwasher or sterilizer cycles.
1.3 Disadvantages
No Color Options: Only monochrome relief; no vibrant colors possible.
High Mold Cost: Custom molds with logo engraving cost 15 – 30% more than standard molds (typically ¥6,000 – ¥15,000 / 850 – 2,100 USD).
Inflexible for Design Changes: Logo modifications require a new mold.
Not Cost-Effective for Small Batches: Economical only at volumes above ~1,000 units.
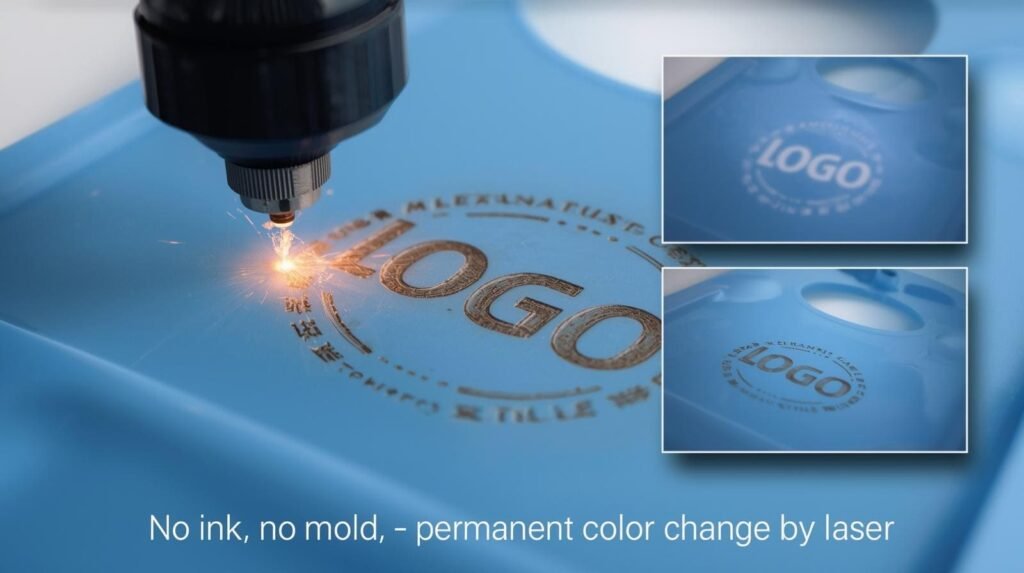
②. Laser Marking (Laser Engraving Logo)
2.1 Working Principle & Process
Core Concept: A high-energy laser beam alters the surface of the silicone through controlled carbonization or oxidation, creating a permanent mark.
Common Types:
Surface Marking: Changes color only; maintains smooth texture.
Deep Engraving: Removes material to create recessed patterns.
Equipment: CO₂ laser systems (30–60W), often with custom jigs for positioning.
2.2 Advantages
Eco-Friendly & Ink-Free: No consumables like inks or solvents.
High Precision: Capable of marking lines as fine as 0.1mm—ideal for text, barcodes, or QR codes.
Permanent & Wear-Resistant: Resists washing, heat, and abrasion.
Fast Prototyping: Digital files enable quick customization (e.g., personalized names).
Food-Safe: As long as the base silicone is food-grade, laser marking introduces no foreign substances.
2.3 Disadvantages
Limited Color Range: Typically results in gray, beige, or light brown tones—no bright colors.
Material-Dependent: Effectiveness varies with silicone formulation; fillers may reduce contrast.
Potential Surface Roughness: Deep engraving can create micro-grooves.
High Equipment Investment: Industrial CO₂ lasers cost ¥30,000 – ¥80,000 (4,200 – 11,200 USD).
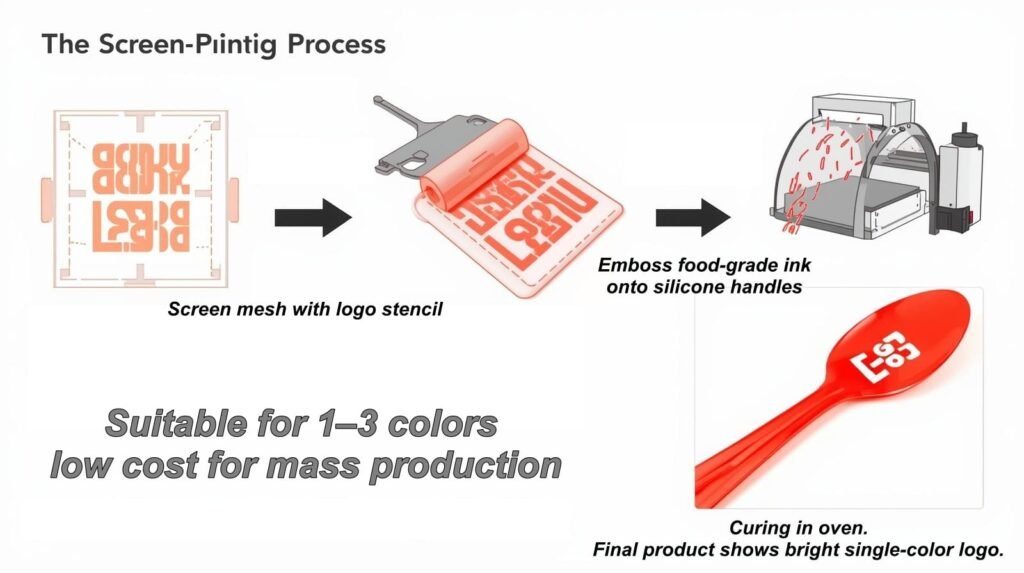
③. Screen Printing Logo
3.1 Working Principle & Process
Core Concept: Food-grade silicone ink is forced through a mesh screen onto the product surface, then cured at high temperature.
Key Steps:
Create a screen stencil (one per color).
Secure the tableware on a printing fixture.Use a squeegee to press ink through the open areas of the screen.
Cure in an oven (150–180°C for 10–20 minutes) to bond the ink permanently.
3.2 Advantages
Vibrant Colors: High saturation with Pantone-matched inks.
Low Cost at Scale: Extremely economical for single-color runs.
Mature Technology: Widely available suppliers and fast turnaround.
Suitable for Flat or Gently Curved Surfaces: E.g., bottom of plates or spoon handles.
3.3 Disadvantages
Moderate Durability: Ink may crack or fade over time, especially with harsh detergents.
Color Limitations: Each additional color requires a new screen and precise registration—costs rise sharply beyond 2–3 colors.
Food Safety Risks: Must use food-contact-certified silicone inks (e.g., Marabu, Teikoku); standard inks may contain heavy metals or VOCs.
Challenging on Complex Curves: Uneven surfaces lead to inconsistent ink coverage.
④. Heat Transfer Printing Logo
4.1 Working Principle & Process
Core Concept: A full-color image is first printed on a special transfer film, then thermally bonded to the silicone surface under heat and pressure.
Common Method: Hot Stamping (Most Common): Uses a heat press (180–200°C, 10–20 sec, 3–5 kg/cm² pressure) to embed the image into the silicone surface.
Key Materials: Food-grade transfer film + high-temperature-resistant inks.
4.2 Advantages
Full-Color, Photorealistic Output: Supports gradients, photos, and complex multi-color designs.
High Detail & Clarity: Excellent for intricate brand visuals or licensed IP artwork.
Flexible for Small Batches: No screens or molds needed—digital printing of films enables customization.
Smooth Finish: Image integrates into the surface without raised edges.
4.3 Disadvantages
Lower Long-Term Adhesion: May wear at edges after prolonged use.
Stringent Material Certification: Both film and ink must comply with FDA/LFGB.
Higher Per-Unit Cost: Transfer films are expensive.
Precision-Dependent Process: Slight deviations in time, temperature, or pressure cause blurring, bubbling, or delamination.
⑤. Comparative Summary
| Criteria | Embossed Logo | Laser Marking | Screen Printing | Heat Transfer |
| Color Capability | No | No | Yes (1–3 colors) | Yes (Full color) |
| Durability | ★★★★★ | ★★★★☆ | ★★★☆☆ | ★★★☆☆ |
| Food Safety | ★★★★★ | ★★★★★ | ★★★★☆ | ★★★☆☆ |
| Tooling Cost | High (Product Mold) | None | Low (Printing Mold) | High (Printing Mold) |
| Ideal Volume | >1,000 pcs | 50 – 5,000 pcs | > 500 pcs | > 500 pcs |
| Best For | Baby products, premium brands, long-life items | Minimalist branding, eco-products, personalization | Mass-market goods, simple Logos | Gifts, IP collaborations, complex art |
⑥. Practical Recommendations
Choose Embossed Logo if:
Your product targets infants, medical use, or safety-critical applications.
You promote a “pure,” “chemical-free” brand image.
Order volume exceeds 3,000 units, justifying mold investment.
Choose Laser Marking if:
Your logo is text-based or minimalist.
You need rapid prototyping or small-batch flexibility.
You value sustainability and clean aesthetics.
Choose Screen Printing if:
Budget is tight and logo is simple (1–2 colors).
You’re producing promotional items or short-lifecycle products.
You have access to certified food-grade inks.
Choose Heat Transfer if:
Your design includes photos, gradients, or licensed characters.
The product is a premium gift, collectible, or seasonal item.
You’re willing to pay a premium for visual impact.
Conclusion
Selecting the right logo application method for silicone tableware involves balancing safety, durability, visual appeal, and cost.
There is no universally “best” technique—only the most suitable one for your specific product strategy.
For high-end baby products, a combination of embossed logo + laser-marked batch codes is emerging as an industry best practice.
For creative or promotional items, heat transfer unlocks unparalleled design freedom.
Ensures every step – from concept to final product—is safe, compliant, and market-ready.